Audio Technica AT-LP120 USB Review
Audio Technica AT LP120USB Review
Music and technology move on at a very fast pace these days, basically much like any technological advancement; if you stand still, you’re lost! The problem with that whole situation is that the things you enjoy about the way things were, can often become lost too, or even obsolete.
For instance, you might have an extensive collection of old LPs or vinyl records, and you might have some of your favorite tunes on them, tunes which you would love to listen to every day. You might not want to keep buying a new format of the music because you feel that it loses its shine; there is something quite extraordinary and retro about an LP, after all. So, what can you do?
Well, thankfully there are many turntables still out there on the market and ones with an enormous amount of features for you to make use of besides only listening to music. Whether you’re a wannabe DJ, a professional, or simply a music lover who wants to try something new, there are many turntables under $300 you can invest in, and use at home, or for your work.
The problem with that, however, is how do you know which are worth the money, and which just aren’t? Yes, there are many record players under $300, and that’s an affordable price to pay, but it’s no good buying substandard equipment. For that very reason, we are going to take a very close look at one of the best on the market, the Audio-Technica AT-LP120-USB. We will look at its specs, what it has that makes it stand out from everything else, and explore whether it is the best for you. Consider this your ultimate Audio Technica AT LP120USB review.
Disclaimer: If you purchase through links on our site, we may earn an affiliate commission. Read More
Appearance
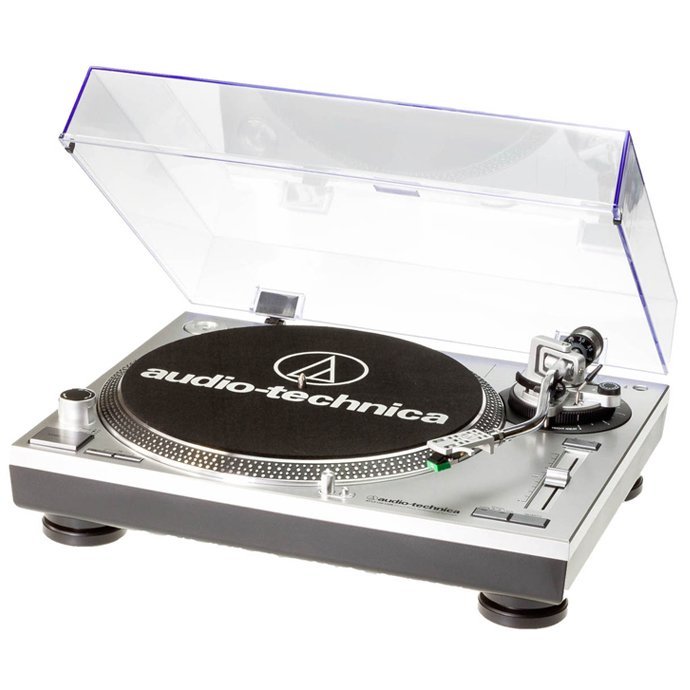

This is a sleek piece of equipment, that’s for sure, and it primarily comes in a black and silver model. It is a compact model, at just 13.9x6x17.8 ”, so it will easily fit into any space you need it to, without being too bulky or getting in the way. Most computer tables will accommodate this extra piece of equipment without much trouble. It is also quite lightweight for what it is, at just 23.5lb, so it can be carried out for those DJs who need to transport equipment. This is not belt driven turntable but direct drive.
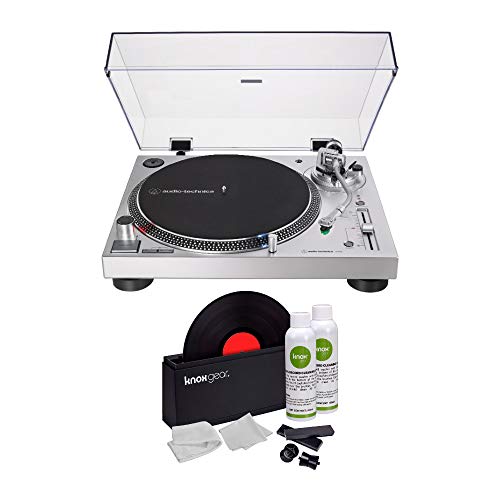
- BUNDLE INCLUDES: Audio-Technica AT-LP120XUSB Direct-Drive Analog and USB...
- DC SERVO MOTOR: Direct-drive, servo motor with fully manual operation
- SELECTABLE: Selectable 33/45/78 RPM speeds
- ALUMINUM PLATTER: Professional-grade anti-resonance, die-cast aluminum...
- HEADSHELL: AT-HS6 universal 1/2"-mount headshell and AT-VM95E Dual Magnet...
Audio Technica AT LP120USB Turntable Features
You are getting a high-quality piece of equipment for a great price.
Here is a specifications list:
- Motor: Direct-drive, high-torque motor
- Manual/Automatic: Fully manual operation
- RPM: Selectable 33/45/78 RPM speeds
- Platter: Professional anti-resonance, die-cast aluminum platter with slip mat
- Headshell/Cartridge: 1/2 inch-mount universal headshell with AT95E Dual Magnet phono cartridge and long-life diamond stylus
- Tonearm: S-shaped tone arm assembly with adjustable counterweight, anti-skate adjustment, tone-arm height adjustment, and lock
- Controls: Start/stop button, speed selector, pitch lock & pitch change slider with +/-10% or +/-20% adjustment ranges, forward and reverse play
- Special Features: USB connectivity with PC or MAC, Audacity software, USB and line-level output RCA cable included, selectable internal stereo phono pre-amplifier, removable hinged dust cover
How To Setup Audio Technica AT LP120USB Turntable
The AT-LP120-USB Turntable is a professional direct-drive turntable with both analog and USB connection capability, so you can use it with all standard audio equipment or plug it directly into your computer. But make no mistake, this isn’t just a tool to transfer records to MP3 – it’s loaded with all the tools you’d expect from a professional turntable, including adjustable tonearm and pitch control, -inch Dual Magnet cartridge, three speeds (33/45/78), DJ functionality and more.
But, as with most professional gear, proper setup is critical to getting the most out of the AT-LP120-USB and ensuring long-lasting operation of the stylus and enjoyment of your records. In this post, we’ll cover headshell and counterweight installation, and tonearm balance. In Part 2 we’ll tell you to have how to set the tracking force and pre-amp selector switch and make anti-skate and tonearm height adjustments.
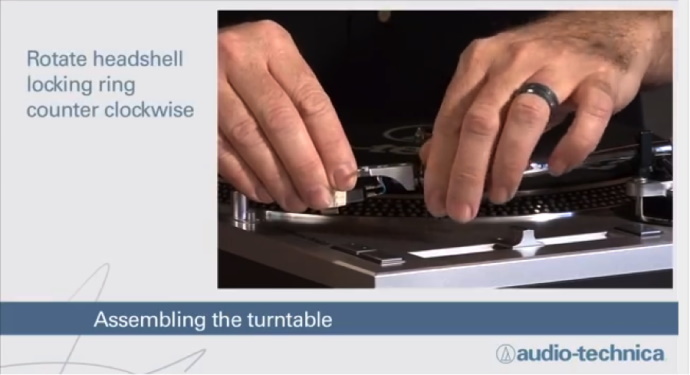
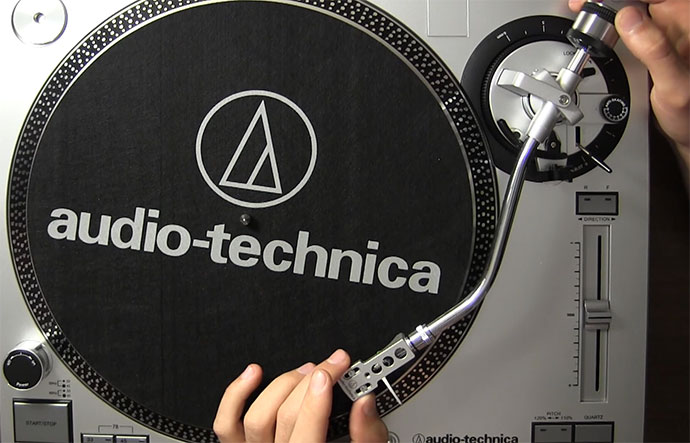
The first order of business is to put all the pieces in place. So set the platter and slip mat onto the turntable spindle, making sure the platter is fully seated. Next, lock the tonearm in place in the tone armrest and attach the headshell assembly by inserting it into the end of the tonearm. While continuing to hold the headshell, rotate the locking ring on the tonearm counterclockwise to pull the headshell securely into place.
Now install the counterweight. With the black stylus force gauge facing forward, screw the counterweight onto the back of the tonearm. Then, if you intend to use the dust cover, slip its hinges into the slots on the back of the turntable and slide the cover into place on the hinges.
Once you have all that taken care of, you can move on to the important matter of balancing the tonearm. This will help ensure that the cartridge tracks properly and that the stylus won’t wear prematurely or damage your records. To get started set the anti-skate dial to 0.
Remove the protective cover from the stylus by sliding it straight forward off the front of the cartridge. Take hold of the headshell and then release the tonearm locking clamp. The tonearm will be unbalanced at this point, so take care not to damage the stylus by letting it come into contact with the slip mat (or anything else). While continuing to gently hold the headshell, rotate the counterweight until the tonearm is horizontally balanced – it should hover just above the platter. Once this is done, lock the tonearm back in place on its rest.

Now it’s time to set the stylus tracking force. Setting the force properly will keep the stylus from skipping out of the record groove at especially dynamic musical passages (too little force) and prevent excessive wear to stylus and records (too much force).
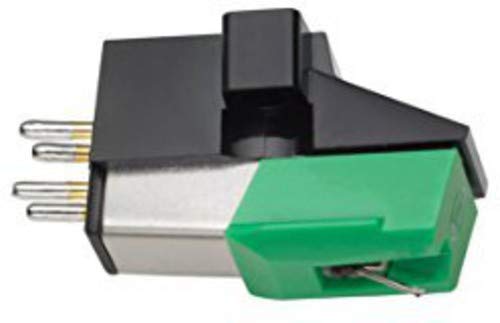
The recommended force varies from cartridge to cartridge, so first you need to determine which cartridge you’re dealing with. The AT LP120 USB turntable currently comes with an AT95E cartridge (identifiable by its green stylus). Before September 2011, the turntable was equipped with the now discontinued ATP-2XN (white stylus). If you are working with the AT95E, we recommend setting the force to 2 grams; if you have the ATP-2XN, set the force to 3.5 grams. (If you ever install an alternate cartridge, you’ll need to adjust the tracking force according to the manufacturer’s recommended setting.)
As you’ll recall from the above text, the stylus force gauge is located on the front of the counterweight. Without adjusting the counterweight, rotate the force gauge so the number 0 lines up with the centerline marked on the rear of the tonearm. Then set the tracking force by rotating the entire counterweight (the force gauge should turn along with the weight) counterclockwise until reaching the desired value.
![]()
Also, to compensate for the natural skating force that pulls the tonearm toward the center of the record, set the anti-skate knob to match the value of the tracking force. However, if you anticipate doing a fair amount of back-cueing, scratching, or reverse-direction operation, you may want to use less or no anti-skate control.
If you use a taller cartridge, thicker slip mat, or play thick records (such as 180 g pressings or old 78s), you may also need to adjust the tonearm height to keep the tonearm parallel. To do so, loosen the height-lock switch and rotate the black height-adjust dial – the lock and dial are both located at the base of the tonearm. Once the height is adjusted correctly, secure it by flipping the switch back into the locked position.

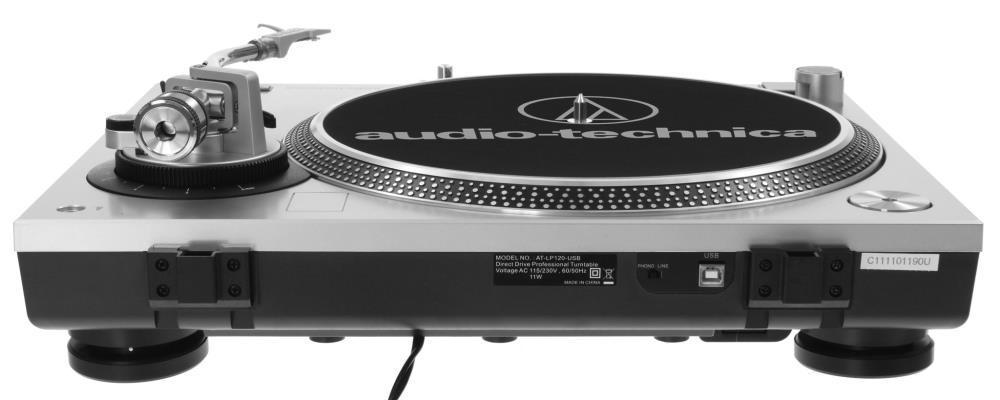
Finally, adjust the PHONO/LINE selector switch on the back of the turntable to set the proper output. If the turntable is connected to a receiver or other device with a dedicated phono input, move the switch to PHONO. If the turntable is connected to a sound card, powered speakers, or AUX-type inputs, set the selector to LINE, which will activate the turntable’s internal pre-amp. If you are using the USB output to connect the turntable to a computer, the selector switch can be set to either PHONO or LINE as the switch doesn’t affect USB output in any way.
You are now ready to use and enjoy your LP120 USB turntable. Just remember, if you change out the cartridge, you will need to rebalance the tonearm and reset the tracking force. Happy listening!
View the video version of these instructions below:
Audio Technica AT LP120 assembly experience:
ASSEMBLY: Quick assembly and simple and step-by-step instructions were included. There was no need for additional tools. A belt is not used in the beltless direct drive. Simply drop it in place. Drop the thick rubber mat onto the platter and that part is done. Next, install the counterbalance on the tonearm and the moving magnet phono cartridge. All conveniently install in compliance with instructions. Remember to remove the cartridge’s safety lock. Next zero the arm (get it so it balances then set the pressure at 1.5 grams and set the anti-skid to 1.5 too. The tonearm is setup. Finally, drop the lid in place with the hinges placed in the obvious slots of each, then check the settings for pre-amp on the back. The default is for pre-amp off so I needed to turn it on for the aux input of my Denon receiver. You may want to plug the B end of the cable into the socket at the back of the turntable if you plan to use the USB output.
OPERATION: Lift the lid (stays up by itself, of course). Set the speed if not already set, set the receiver input to the one used for the turntable, and use the lift to drop the needle gently at the beginning of the album. After that just enjoy it! I used the USB output to rip a few albums back when I first got the turntable. In my Windows 7 Pro laptop, the included program worked fine and the job was done. It’s been a while since the last time I used that.
CONCLUSION: I got this turntable so I can play my vinyl collection on my living room home theater system. For years now, it has been a perfect fit and it sounds great. At the end of the album you get thump-thump-thump-thump, so the lack of automatic start/stop is a bit annoying. It has many advanced features that I usually don’t use as pitch control, reverse spin, and strobe.
There’s a lot of technical information there, and much of it you might not understand if you are just starting in the music mixing business. Of course, you can also use this product simply for listening to your old vinyl records, and that is a legitimate use for it. Do bear in mind however that the Audio-Technica AT LP120 runs on 120 V AC voltage, so if you are ordering this from outside the USA, check your voltage and whether it is compatible via an adapter.
- BUNDLE INCLUDES: Audio-Technica AT-LP120XUSB Direct-Drive Analog and USB...
- DC SERVO MOTOR: Direct-drive, servo motor with fully manual operation
- SELECTABLE: Selectable 33/45/78 RPM speeds
- ALUMINUM PLATTER: Professional-grade anti-resonance, die-cast aluminum...
- HEADSHELL: AT-HS6 universal 1/2"-mount headshell and AT-VM95E Dual Magnet...
A top features of this turntable are:
1. Easy to connect via USB with your PC or MAC
2. Great and proven AT95E dual magnet cartridge
3. The highly adjustable tonearm
LP120USB turntable is certainly to be recommended for experts and beginners alike, and the great thing about this product is that it is so versatile. If you understand it’s specifications, then you can use them to their max. If you aren’t so sure at the start, you can either use it for your basic needs, or you can work your way up to fulfilling its potential as you experiment with your musical needs. Certainly, for the cost, this is something you can make different uses out of, depending on your level of expertise and your basic requirements too.
Audio Technica AT LP120 can be used for DJ-ing very successfully as you can see in the video below:
√ Check The Price and Read Customer Reviews √
Is the Audio Technica LP120 Good?
If you are a music enthusiast who wants to play around with different settings and digitalize your old favorite vinyl records onto MP3 while working your way up to DJ standard, or perhaps a DJ who needs a new piece of kit, the Audio-Technica AT-LP120 is certainly worth the price tag. At just under $300, you aren’t going to break the bank when purchasing this model, and you will get quality for what you pay.
The manual can be downloaded here: Audio Technica AT-LP120-USB Manual.
If you are interested in another one great record player under $300, check record player reviews of TEAC TN-300 Review, or Denon DP-300F Review.
Pros
- The AT95E Dual MM Cartridge
Sounds Great - Direct Drive Platter
- Quick Assembly/Setup
- USB Output For Ripping Vinyl
To MP3 - Silver/Black Color Scheme
Looks Great - Good Vibration Isolation
- Speeds 33 1/3, 45 and 78 RPM
- Fine-tune platter speed control
- Pitch Control to fine-tune
platter speed - 45 Single Adapter Included
Cons
- No automatic lift
Audio Technica At-LP120-USB Specifications
- USB output—no special drivers required for direct connection to your computer
- Direct drive high-torque motor
- Selectable 33/45/78 RPM speeds
- Selectable internal stereo phono pre-amplifier
- S-shaped tonearm assembly with:
Adjustable counterweight
Anti-skate adjustment
Tonearm height adjustment and lock
Tonearm lift with hydraulic action and lift lever
Tonearm rest with locking mechanism - Selectable high-accuracy quartz-controlled pitch lock
- Selectable +/–10% or +/– 20% pitch adjustment ranges
- Stroboscopic platter speed indicator
- Forward and reverse play
- Cast aluminum record platter with slip mat
- Start/stop button
- The pop-up stylus target light
- 45-RPM adapter with storage receptacle
- Receptacle for extra headshell
- Adjustable feet for leveling
- Removable hinged dust cover
More from my site
 Totally free Slots untamed wolf pack slot machine Free Online casino games Online
- UP-X онлайн казино бонусы.1313
- Казино Онлайн узнайте о новых акциях и промокодах от Pin Up Casino.365
- Промокоды МЕЛБЕТ возьмите февраль 2025 Промокод Melbet 25 000 при регистрации Возьмите бесплатную ставку а еще купон
- официальный сайт в Казахстане Olimp Casino.16692 (2)
- Pelican kasyno oferta gier automaty i gry stoowe.1380